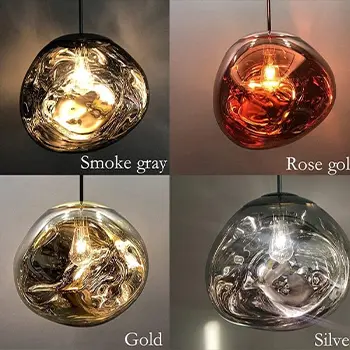
Modern chandeliers are more than just an ornamental lighting piece,
However, they can also be used as ornaments for interiors. Moreover, to install a chandelier is not an easy task.
This is why J&S lighting furniture installers have documented the complete procedure of installing chandeliers so those who want to put up chandeliers can learn!
Check the package by opening it and examining all the components as per the directions.
Chandeliers are not only ornamental lighting, they also contain various accessories.
It’s not a common fixture. Installers can check the components by following the installation directions.
Contact the retailer if you’re in doubt.
If the lighting installation host is unpacked, the customer must be present, and installation can only be guaranteed when there are no issues with the lighting.
Installation of chandelier
1.First put together the lamp body of the chandelier and thesurrounding lamp arms (where the lamp will be installed).
After taking the light strip apart, as illustrated in the photo above, you’ll be able to determine where the arms of the light can be attached.
The lamp arms have to be secured each one by one with an abrasive after connecting the lamp arm. The lamp arms must be evenly distributed following installation. If not the installation will be complete. The chandelier will be angled toward the heavier end of the arm.
3.Connect the various wires of the lamp arm in a proper manner. Don’t connect the wrong wire. If you connect a brand new light bulb, and later discover that one of the arms isn’t lit, you will need to take it off to conduct maintenance.
The lamp and chandelier are being put together. top plate) is put in place.
Place the light holder for ceiling in the location you prefer for installation.
The method of installation is similar to installing ceiling lamps. First, place the lamp holder onto the hole to pull out the hole. You can then employ a drill and then install the expansion screw. Fix the lamp holder.
Connect the main power source for your ceiling to a chandelier power supply.

7. Adjust the assembly height and attach the glass bowl and shell above the arm.
8.Finally, install the cover with a decorative design (that is, the cover on the base) Then, turn off the power source to determine whether the chandelier will start normally.
There are other issues you need to be aware of:
Fix chandelier on ceiling hole
The first step of installing a chandelier embedded. Install a sheet of metal over the ceiling. Next, install a series of braces that protrude from the back of the LED panel lights. After that, put your panel in the bracket that is in line with the slot on the metal sheet. Ceilings can be fixed. But, due to the differing thickness of the ceiling, the height between the ceiling and the light’s surface will need to be adjusted, otherwise the LED panel light may be higher or lower than the ceiling’s top surface following the installation.
Installing the second option is straightforward: simply drill screws in the ceiling, and then slide intothe frame of the ceiling. Then install the panel on the ceiling. The light fixture is placed into the slide-in fixed mounting frame. The fourth side is mounted to the frame that is screw-mounted. Convenient and easy.
Wire hanging is the third method of installation: fix the part of installation for the hanging wire to the ceiling, and fix the screws. (The hanging wire was put in place at the factory. The wire hanging is horizontal and the elements are hanging by the LED back lighting. It is simple to install and can be saved. Customers should be cautious to ask whether the suspension components are standard components or optional components.
Installation Precautions
- This product runs on standard voltage, please do not over-do the range of working voltage;
- Make sure your power is off prior to installation.
- Please carefully read the instructions before installing any item.
- Pay attention to waterproof, electricity-proof and shock-proof;
- This product should only be used indoors.
How do you set up a chandelier that has an integrated ceiling?
- Decorate the connection device using iron or wood pieces to alter the lighting error according to it. It can be fixed by welding or screwed, nailed, or screwed. Once you have completed these steps, the chandelier installation is now almost completed.
- Pick the spot for the chandelier according to the height it will be placed in your living space. This way you’ll be able to avoid the need to embed wires into ceilings.
- The decorative materials must be incorporated into the structural layer. Be sure the placement is correct and maintain specific positions to allow for adjustment of the chandelier.
- Connect slings booms to connect devices.
the last thing to mention:
It is not recommended to install chandeliers in ordinary commercial buildings, particularly those with low floor elevations.
The majority of chandeliers currently are able to emit light upwards. It is suggested you pair them with spotlights and downlights to create the traditional ceiling design.
Nowadays, most chandeliers employ GU10 series light bulbs as their light sources, which are extremely powerful, but they cannot dissipate heat, and are vulnerable to breaking. Traditional E27 or E14 bulbs require a bigger lampshade and lamp head, which may make you feel low.
It is recommended that you install a chandelier that is both practical and easy to use. Of course, it’s possible to also be set to alter the light level as well as the temperature.